【追記2014/7/7】
記事中のAppiumのドキュメントへのリンク先は削除されてしまったようです。その代わりに公式サイトのドキュメントが整備されています。
【追記2014/7/16】
Appiumの新しいバージョン(1.2.0)に関する記事を書きました。
こんにちは、間藤です。
Appiumによる自動テストの第3弾です。今回はハイブリットアプリの自動テストです。UIWebViewをいかにして操るのかということがポイントです。
実行環境等
テスト対象のアプリは、付属のサンプルを利用します。このアプリに対するJavaで書かれたテストが提供されていないようなので、今回は自作しました。
| ホストPC | OS X Mavericks |
| Xcode | 5.0.2 |
| Appium | 0.12.0 |
| iOSシミュレータ | 7.0.3 |
| iOS実機 | 7.0.4 |
| テスト対象アプリ | sample-code/apps/WebViewApp |
| テストスクリプト | 自作します |
テスト対象となるアプリ
URLを入力するためのUITextField、入力したURLへのリクエストを実行するためのUIButton、結果を表示するUIWebViewという構成のアプリです。

テストスクリプト
テストスクリプトはAppiumのドキュメントを参考にして作成しました。
package jp.co.iti.appium;

import java.io.File;
import java.net.URL;
import java.util.concurrent.TimeUnit;

import org.junit.After;
import org.junit.Before;
import org.junit.Test;
import static org.junit.Assert.assertEquals;

import org.apache.commons.io.FileUtils;

import org.openqa.selenium.By;
import org.openqa.selenium.WebDriver;
import org.openqa.selenium.WebElement;
import org.openqa.selenium.remote.CapabilityType;
import org.openqa.selenium.remote.DesiredCapabilities;
import org.openqa.selenium.remote.RemoteWebDriver;
import org.openqa.selenium.TakesScreenshot;
import org.openqa.selenium.OutputType;
import org.openqa.selenium.remote.Augmenter;

public class SimpleWebViewTest {

    private WebDriver driver;

    @Before
    public void setUp() throws Exception {
        // set up appium
        File appDir = new File(System.getProperty("user.dir"),
                               "../../../apps/WebViewApp/build/Release-iphonesimulator");
        File app = new File(appDir, "WebViewApp.app");
        DesiredCapabilities capabilities = new DesiredCapabilities();
        capabilities.setCapability(CapabilityType.BROWSER_NAME, "");
        capabilities.setCapability(CapabilityType.VERSION, "6.0");
        capabilities.setCapability(CapabilityType.PLATFORM, "Mac");
        capabilities.setCapability("device", "iPad Simulator");
        capabilities.setCapability("app", app.getAbsolutePath());
        driver = new RemoteWebDriver(new URL("http://127.0.0.1:4723/wd/hub"),
                                     capabilities);
        Augmenter augmenter = new Augmenter();
        driver = augmenter.augment(driver);
    }

    @After
    public void tearDown() throws Exception {
        driver.quit();
    }

    private void getScreenshotAs(String path) {
        TakesScreenshot ts = (TakesScreenshot) driver;
        try {
            FileUtils.copyFile(
                    ts.getScreenshotAs(OutputType.FILE),
                    new File(path));
        } catch (Exception e) {
            e.printStackTrace();
        }
    }

    @Test
    public void testUIComputation() throws Exception {
        // ページロードのタイミングをはかるための措置
        driver.manage().timeouts().implicitlyWait(30, TimeUnit.SECONDS);

        // テキストにURLを入力
        WebElement text = driver.findElement(By.tagName("textField"));
        String url = "http://saucelabs.com/test/guinea-pig";
        text.sendKeys(url);

        // GOボタンをクリック
        driver.findElement(By.tagName("button")).click();

        // WebViewに切替
        for(String winHandle : driver.getWindowHandles()){
          driver.switchTo().window(winHandle);
        }

        // 遷移したWebページの検査
        WebElement div = driver.findElement(By.id("i_am_an_id"));
        assertEquals("I am a div", div.getText());

        // Webページ上のDOM要素の値を変更
        driver.findElement(By.id("comments")).sendKeys("My comment");

        // キャプチャをとる
        getScreenshotAs("capture_webviewtest.jpg");
    }
}
ネイティブアプリ編との一番の違いは、UIWebViewに対する制御です。ハイブリッドアプリの場合、WebViewに表示しているDOM要素を操作したいので、コンテキスト(?)を切り替える処理を行っています。
for(String winHandle : driver.getWindowHandles()){
  driver.switchTo().window(winHandle);
}
ループを回していることに違和感を覚えるのですが、Appiumのドキュメントに掲載されていたサンプルコードを参考にしたものです。この切替ができれば、それ以降のDriverに対する操作(findElement等)は、WebViewに対して行われるので、JavaScriptでDOM要素を制御する感覚でテストを書けます。
この他のポイントとしては、非同期処理の待機を行っていることです。DOM要素を操作する前提として、WebViewがページロードを終えていなければなりません。以下の処理を実行したとき、ページロードが終わっていないと、テストがエラーとなってしまいます。
WebElement div = driver.findElement(By.id("i_am_an_id"));
Thread.sleep()などで、待機処理を自分で書くこともできますが、以下のようにimplicitlyWait()メソッドを使うことで、簡単に待機処理を実現できます。
driver.manage().timeouts().implicitlyWait(30, TimeUnit.SECONDS);
こうしておくと要素が取得できるまで最大30秒間待機してくれます。
事前準備
テスト実施の前にいくつか準備が必要です。
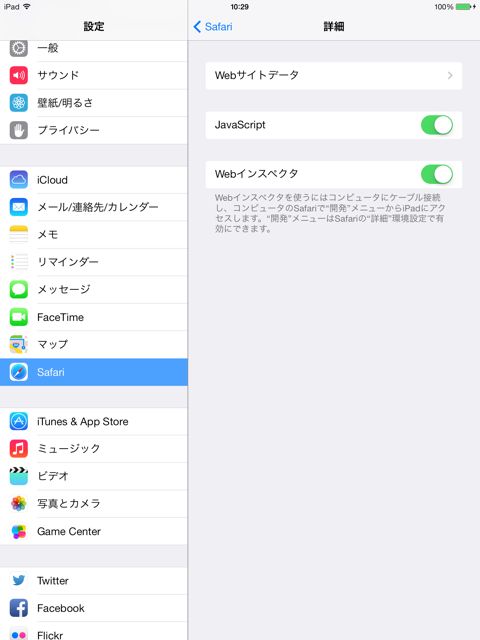
まず、Mobile Safariの設定を確認し、Webインスペクタ設定をオンにしてください。(シミュレータも同様です。)

UIWebViewに対する操作は、SafariのWebインスペクタを利用するようです。
次に、こちらのドキュメントを参考にして、ios-webkit-debugger-proxyをインストールしてください。実機でテストする場合、ios-webkit-debugger-proxyを経由してUIWebViewに対する操作を行う仕組みになっています。シミュレータの場合、ios-webkit-debugger-proxyは必要ありません。
シミュレータで実行
まず、Appiumサーバを起動します。
> appium
そして、テストを実行します。
> cd sample-code/examples/java/junit
> mvn test -Dtest=jp.co.iti.appium.SimpleWebViewTest
実機で実行
実機で実行する場合は、ios-webkit-debugger-proxyを起動しておきます。
> ios_webkit_debug_proxy -c (実機のUDID):27753
パラメータにポート番号を指定していることに注意してください。Appiumはこのポートに接続してくるようになっています。
Appiumサーバを起動します。
> appium -U (実機のUDID)
そして、テストを実行します。
> mvn test -Dtest=jp.co.iti.appium.SimpleWebViewTest
トラブルシューティング
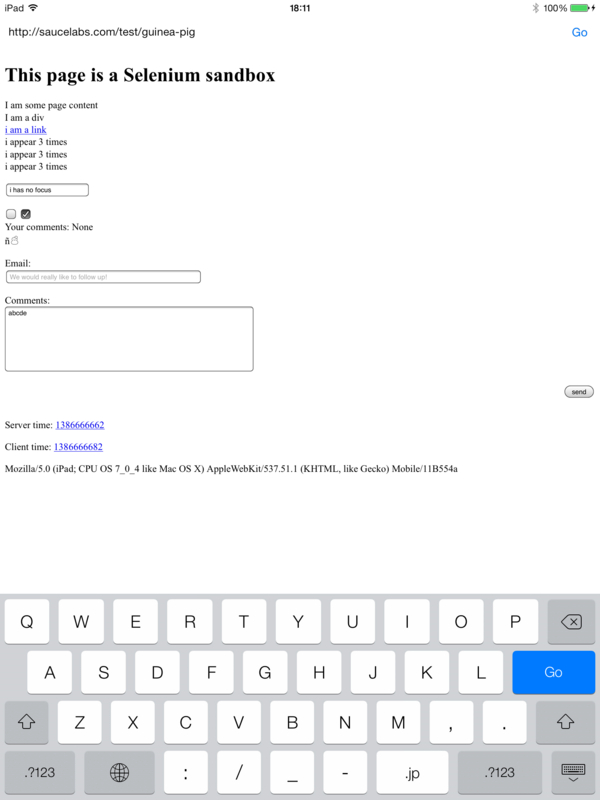
今回のテストシナリオでは、最初にURLを入力しています。この際、日本語入力として解釈されてしまうと、以下のように出鱈目な入力になってしまい、テストが正常に動きません。

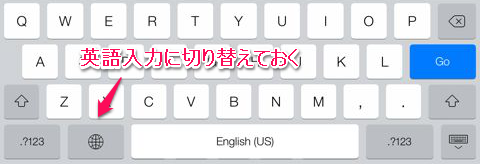
これを回避するため、テスト実施前にキーボードを英語入力に切り替えておきます。

ただ、テストシナリオの途中で切り替えたいこともあるでしょう。やや無理やりな感はありますが、以下ようにすると、入力切替のボタン押下をシミュレートできました。
WebElement text = driver.findElement(By.tagName("textField"));
text.click();
WebElement button = driver.findElement(By.name("Next keyboard"));
button.click();
最初にテキストフィールドをクリックしているのは、キーボードが表示されるようにするためです。なお、対象ボタンのname属性を調べるため、私はまず以下のようなプログラムで確認を行いました。
List<WebElement> elems = driver.findElements(By.tagName("button"));
System.out.println("-----");
for (WebElement elem : elems) {
    System.out.println("[atr]" + elem.getAttribute("name"));
}
System.out.println("-----");
次回は、「Mobile Safari編」を投稿します。